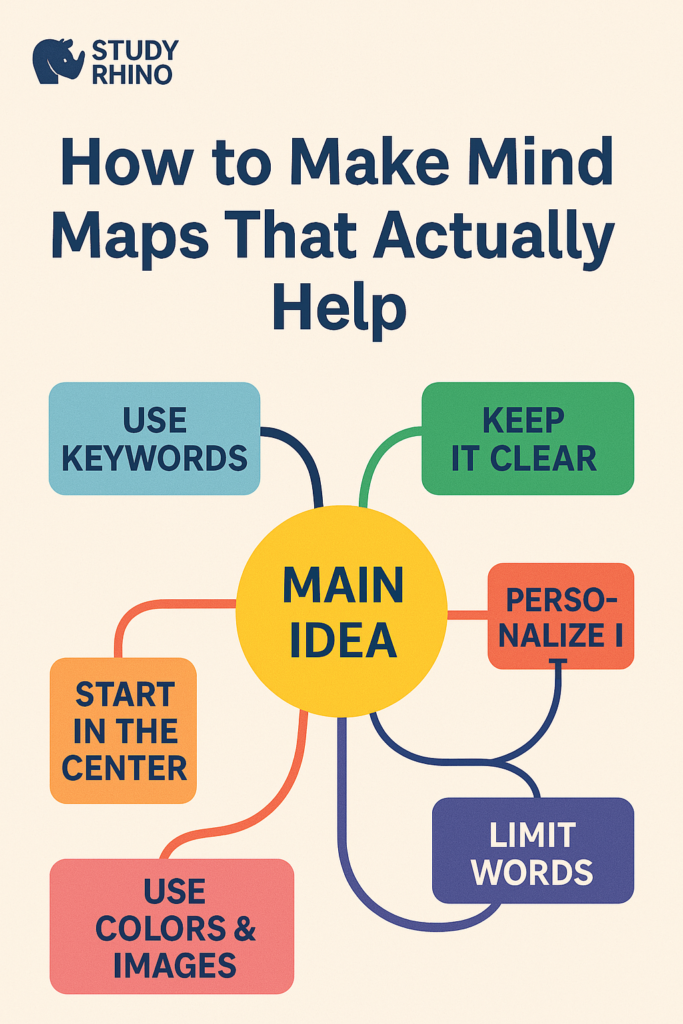

Mind mapping is an incredibly effective technique for learning, organizing information, and sparking creativity. However, simply drawing a few branches and writing some text doesn’t guarantee success. At Study Rhino, we believe mind maps should clarify your understanding, not complicate it. In this guide, we’ll explore how to create effective mind maps that are not only visually appealing but genuinely useful.
What Is a Mind Map?
A mind map is a diagram used to visually organize information. Instead of listing facts in a linear format, a mind map starts with a central idea and branches out to related topics. This branching mimics the brain’s natural way of thinking, making it easier to connect and retain information. Understanding how to create effective mind maps can significantly enhance your study habits and comprehension.
Why Use Mind Maps?
Mind maps are popular for several reasons:
- Better memory retention: Visual structures help you recall information more easily.
- Increased creativity: Flexible layout allows room for spontaneous ideas.
- Enhanced concentration: Focusing on one central idea reduces distraction.
- Simplified information: Breaking complex topics into manageable sections makes them easier to grasp.
If you want to know how to create effective mind maps, it starts with knowing why they’re so valuable.
Mistakes to Avoid When Creating Mind Maps
Let’s look at some common pitfalls to steer clear of:
- Too much text: Cluttering your map with paragraphs defeats the purpose.
- Disorganized structure: Without a logical flow, your map can become confusing.
- No visual elements: A lack of images or icons reduces engagement.
- Monochrome layout: Using only one color makes it harder to distinguish sections.
- Not reviewing the map: Creating the map isn’t enough; revisiting it helps reinforce learning.
Avoiding these errors is crucial when learning how to create effective mind maps.
Step-by-Step Guide to Making Effective Mind Maps
1. Define Your Central Topic Clearly
Choose a specific topic and place it at the center of your map. Highlight it using bold text or an image to draw focus. This will be the anchor for your entire mind map.
Tip: Encircle your main topic or use an icon to make it stand out visually.
2. Develop Primary Branches for Major Concepts
Extend several branches from the central idea. These should represent the core components or key themes related to the topic.
Tip: Assign a different color to each main branch to create clear visual separation.
3. Add Subtopics and Supporting Details
From each main branch, add smaller branches containing relevant details. Keep these short—stick to keywords or short phrases.
Tip: Avoid writing full sentences. Keywords are quicker to scan and easier to memorize.
4. Include Visual Elements
Incorporate symbols, sketches, or small illustrations to bring your map to life. This can make studying more enjoyable and memorable.
Example: Use a sun icon to represent “Sunlight” in a science-related map about photosynthesis.
5. Maintain a Clear Hierarchy
Structure your map logically: start from the center and work outward with decreasing levels of detail. Avoid overlapping lines or disorganized branches.
Note: Digital tools like MindMeister or XMind help maintain a clean structure.
6. Apply Color Strategically
Colors aren’t just for decoration. They help to categorize and prioritize information. Use consistent coloring throughout the map.
Tip: Highlight important points in red or bold shades to draw attention.
7. Personalize Your Map
Add your own flair—use shorthand, doodles, or humorous notes. A personal touch can improve your emotional connection with the material.
Example: To make a history topic memorable, add a quirky cartoon of a historical figure.
8. Revisit and Revise Regularly
Mind maps are most effective when used frequently. Review them often and update them with new insights or corrections.
Study Tip: Redrawing your map from memory can reinforce your understanding.
Recommended Tools for Mind Mapping
You can create mind maps by hand or using digital platforms. Here are a few suggestions:
- Pen and paper: Ideal for those who enjoy tactile learning.
- XMind: A versatile and free mind mapping tool.
- MindMeister: Great for team projects and collaboration.
- Coggle: Simple and browser-based.
- Notion/OneNote: Good options for integrating maps with other study materials.
Whether using digital or traditional tools, knowing how to create effective mind maps will make these tools more valuable.
Practical Uses of Mind Maps
Mind maps are beneficial in many contexts beyond academics:
Academic Use
- Outline lesson content
- Organize revision plans
- Break down complex subjects
Professional Use
- Generate ideas for projects
- Structure presentations
- Track goals and tasks
Personal Development
- Plan life goals
- Reflect on personal values
- Monitor habits and progress
Example Mind Maps That Work
Example 1: Biology Review Map
Central Idea: The Circulatory System
- Heart
- Chambers
- Heartbeat control
- Arteries
- Thick walls
- Oxygen-rich blood
- Veins
- Valves
- Oxygen-poor blood
Visuals: Heart icon, red/blue arrows for blood flow Color Scheme: Red for arteries, blue for veins, green for the heart
Example 2: Content Creation Plan
Central Idea: Starting a YouTube Channel
- Gear Needed
- Camera, Microphone
- Content Planning
- Scripting, Editing
- Promotion
- Social media, SEO
Visuals: YouTube icon, megaphone, film slate Color Scheme: Different tones for each category
Final Tips for Better Mind Mapping
- Perfection isn’t necessary: A functional map is better than a flawless one.
- Practice regularly: The more you map, the better you get.
- Explain your map: Teaching others helps reinforce your learning.
- Combine methods: Use with flashcards, summaries, or quizzes for a comprehensive study approach.
If you apply these principles, you’ll quickly master how to create effective mind maps and see the difference in your study results.