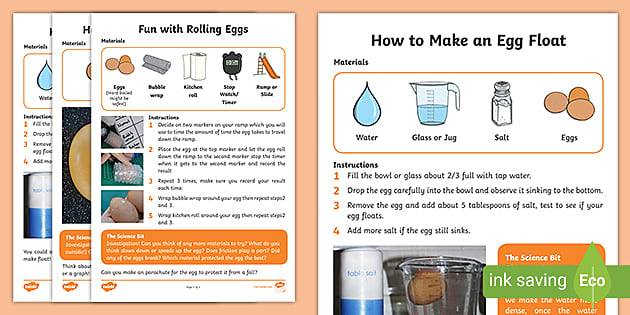
Science is all around us—from the way plants grow to how magnets attract metals. The best way to understand science isn’t just by reading about it but by doing it. Conducting a science experiment is one of the most exciting and effective ways to learn. It allows students to ask questions, test ideas, and see the results right in front of them. Whether you’re a student, parent, or teacher, this guide by Study Rhino will walk you through everything you need to know about conducting a simple science experiment.
Why Do Science Experiments?
Science experiments allow students to:
- Explore real-world concepts
- Develop critical thinking and problem-solving skills
- Learn by doing, which enhances memory and understanding
- Discover the joy of curiosity and exploration
Whether you’re preparing for a school science fair or just want to try something fun at home, you don’t need fancy lab equipment or a degree in chemistry. All it takes is curiosity and a few basic materials.
Step-by-Step Guide: How to Conduct a Simple Science Experiment
Let’s break down the process into seven key steps:
1. Ask a Question
Every great science experiment starts with a question. The question should be something you can test through observation and experimentation.
Examples of good science questions:
- What makes ice melt faster: salt or sugar?
- Do plants grow better in sunlight or artificial light?
- Which type of paper towel absorbs more water?
Tip: Start your question with “What,” “Why,” or “How.”
2. Do Some Background Research
Before you jump into your experiment, it helps to learn a little more about your topic. This doesn’t mean you need to read a thick science book—just a quick online search or a look through your textbook will do.
For example: If you’re testing how salt affects ice, read about why salt lowers the freezing point of water.
Purpose of research:
- To understand the science behind your question
- To help you form a better hypothesis
- To avoid repeating experiments that already have obvious answers
3. Form a Hypothesis
A hypothesis is an educated guess. It’s your prediction about what you think will happen in the experiment, based on your research.
Format:
- “If [I do this], then [this will happen] because [reason].”
Example:
- If I sprinkle salt on ice, then it will melt faster than sugar because salt lowers the freezing point of water.
Note: It’s okay if your hypothesis turns out to be wrong. That’s still science!
4. Plan Your Experiment (Materials and Procedure)
Now it’s time to organize your experiment.
A. Materials:
Make a list of everything you’ll need. Keep it simple and safe.
Example:
- 3 ice cubes
- Salt
- Sugar
- Stopwatch
- 3 plates
- Measuring spoon
B. Procedure:
Write clear, step-by-step instructions so anyone can repeat your experiment.
Example Procedure:
- Place one ice cube on each plate.
- Sprinkle 1 teaspoon of salt on the first ice cube.
- Sprinkle 1 teaspoon of sugar on the second ice cube.
- Leave the third ice cube plain as a control.
- Start the stopwatch and observe which one melts the fastest.
Tip: Always include a “control” group—the sample that doesn’t get any special treatment. It helps you compare your results.
5. Conduct the Experiment
Time for action! Follow your procedure step by step.
While doing the experiment:
- Record your observations carefully.
- Take pictures or videos if needed.
- Keep a science notebook to write down everything you see.
Safety First: Always have adult supervision if you’re dealing with heat, sharp objects, or chemicals. Wear gloves or goggles if necessary.
6. Analyze Your Results
Once the experiment is complete, it’s time to look at what happened and why.
Questions to ask:
- What did you observe?
- Did the results match your hypothesis?
- Were there any surprises?
- Can you explain why the outcome occurred?
Example:
- The ice cube with salt melted in 10 minutes.
- The one with sugar took 14 minutes.
- The plain one took 20 minutes.
This confirms that salt melts ice faster than sugar.
7. Draw a Conclusion
Your conclusion should answer your original question and explain whether your hypothesis was correct.
Example Conclusion: My hypothesis was correct. Salt made the ice melt faster than sugar. This is because salt lowers the freezing point of water, making it melt faster.
You should also mention:
- Any problems you faced during the experiment
- What you might do differently next time
- Other questions the experiment made you think of
Example Science Experiments for Beginners
Here are a few fun and easy science experiments you can try:
A. Dancing Raisins
Question: What happens when you drop raisins into a fizzy drink?
Materials:
- A clear glass
- Raisins
- Lemon soda or sparkling water
What to do: Pour the soda into the glass and drop in a few raisins. Watch as the bubbles lift them up and they dance in the glass!
Science Behind It: Carbon dioxide bubbles attach to the raisins, making them float. When the bubbles pop, the raisins sink again.
B. Volcano Eruption
Question: What causes a chemical reaction between baking soda and vinegar?
Materials:
- Baking soda
- Vinegar
- Food coloring (optional)
- A small plastic container
What to do: Put baking soda in the container, add a few drops of food coloring, and pour in vinegar. Watch the “lava” erupt!
Science Behind It: Baking soda (a base) reacts with vinegar (an acid) to produce carbon dioxide gas, causing the fizzing eruption.
C. Rainbow in a Jar
Question: Can liquids of different densities form layers?
Materials:
- Honey
- Dish soap
- Water (colored with food coloring)
- Oil
- A clear jar
What to do: Carefully pour each liquid into the jar in order. Don’t mix them. You’ll see beautiful, colorful layers.
Science Behind It: Liquids with different densities don’t mix easily. The heaviest liquid stays at the bottom, and the lightest stays at the top.
Tips for a Successful Science Experiment
- Be patient – some experiments take time.
- Stay organized – keep your materials and steps clear.
- Use visuals – take photos of each stage for your report.
- Repeat your experiment – this helps confirm your results.
- Have fun – science is about curiosity and discovery!
How to Present Your Experiment
If you’re doing this for school or a science fair, you’ll likely need to share your findings.
Here’s how to present your experiment:
- Title: Make it catchy but clear
2. Question: What were you trying to find out?
3. Hypothesis: What did you think would happen?
4. Materials & Procedure: What you used and what you did
5. Observations & Data: Include charts, photos, or tables
6. Conclusion: What you learned
7. Sources: Mention any websites or books you used
You can use a presentation board, slideshow, or printed report.
Final Thoughts from Study Rhino
At Study Rhino, we believe science is more than just a subject—it’s a way of thinking and exploring the world around us. Conducting a simple science experiment helps students build confidence, curiosity, and a love for learning. You don’t need a lab to be a scientist; all you need is a question and the will to find an answer.
So go ahead—ask a question, test your ideas, and discover something new. Your next great experiment could be just a kitchen cupboard away.


